

Goal
In this guide, we’re going to cover the following:- Warehouse-native product analytics
- How to integrate Mitzu to ClickHouse
1
Gather your connection details
To connect to ClickHouse with HTTP(S) you need this information: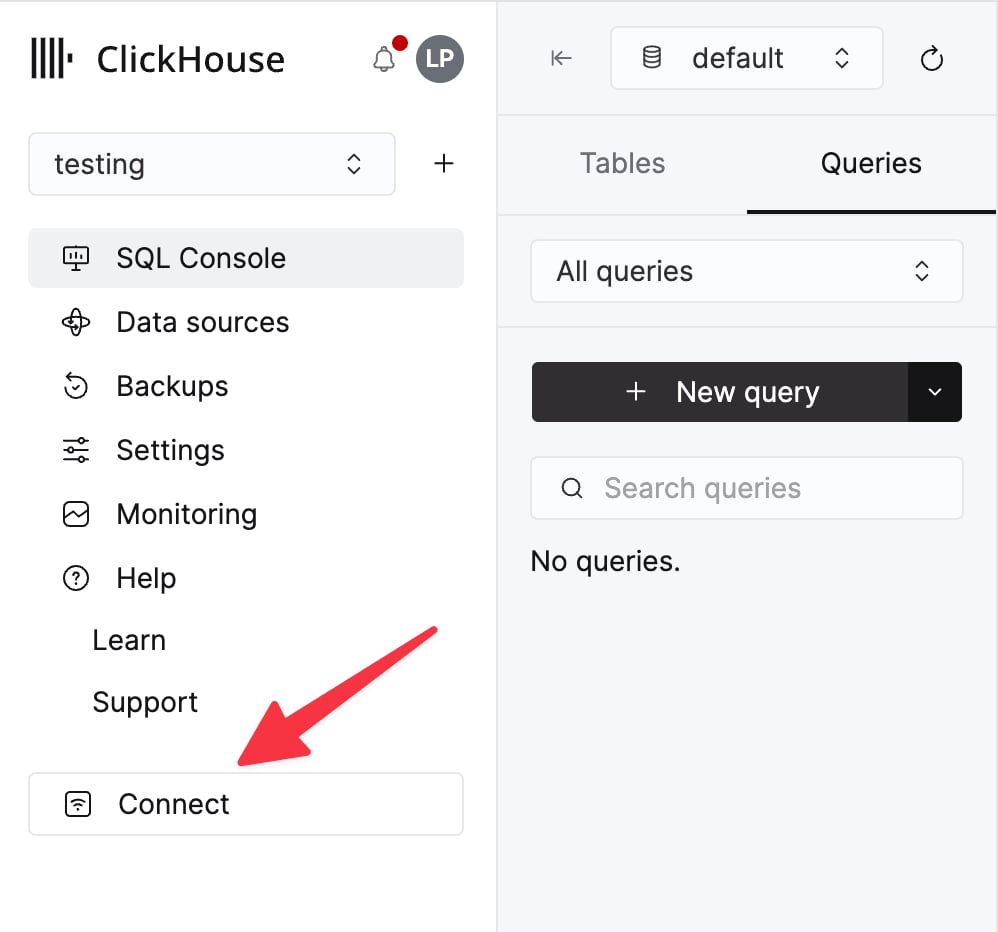
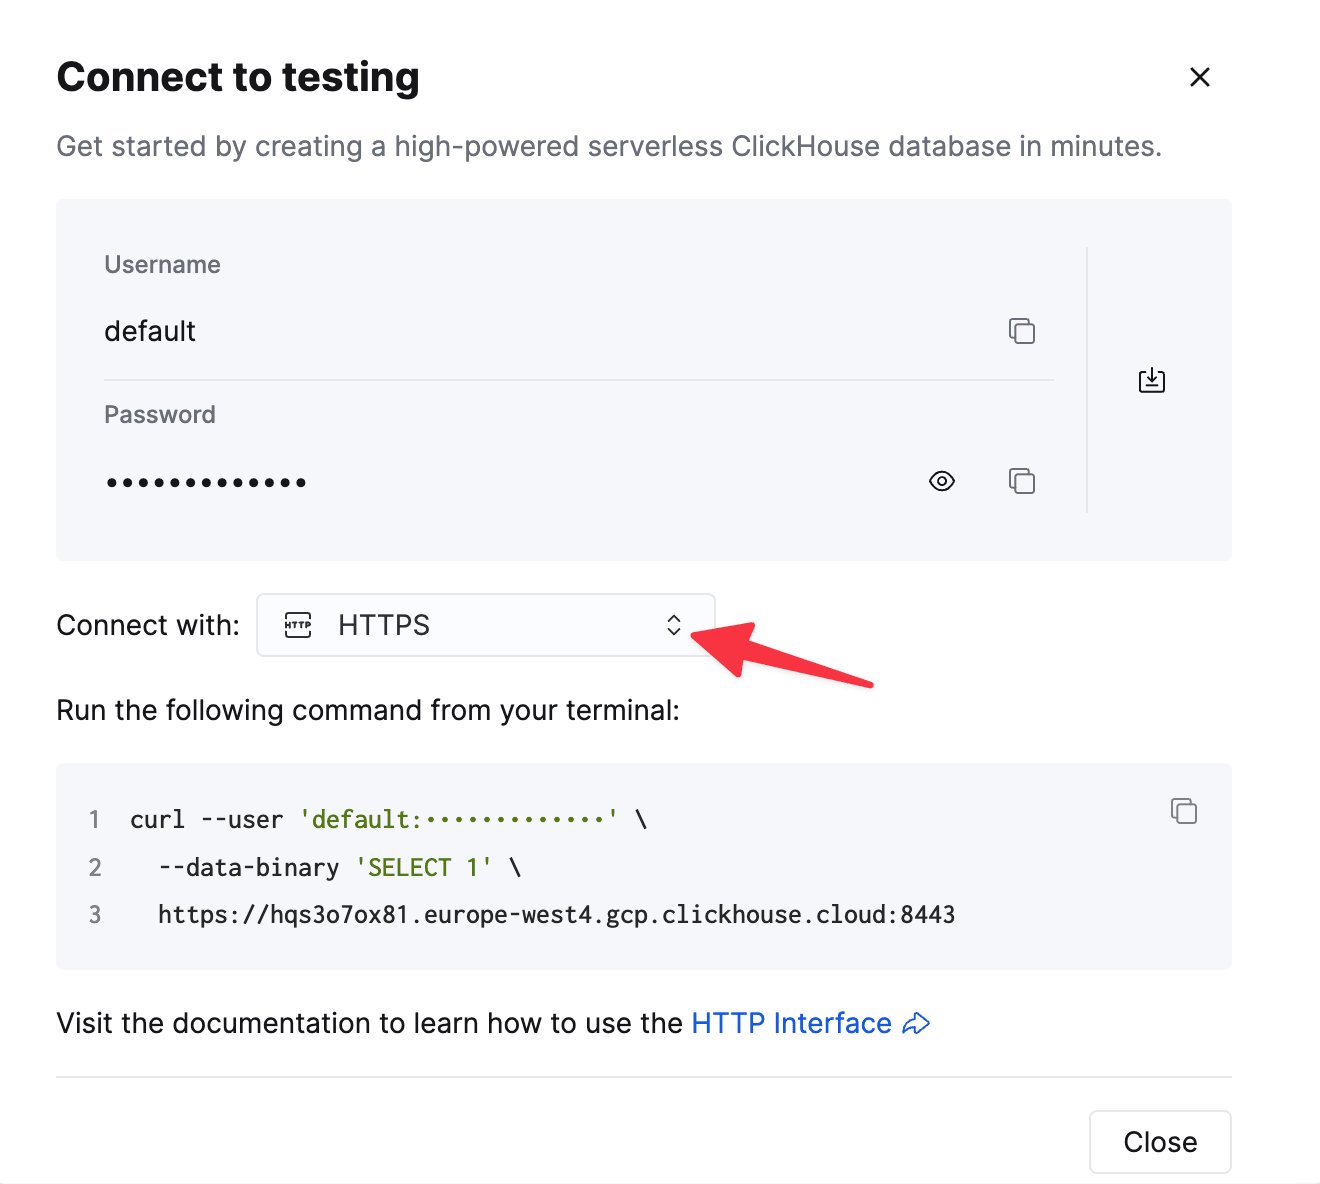
The details for your ClickHouse Cloud service are available in the ClickHouse Cloud console.
Select a service and click Connect:
curl command.2
Sign in or sign up to Mitzu
As a first step, head to https://app.mitzu.io to sign up.
3
Configure your workspace
After creating an organization, follow the
Set up your workspace onboarding guide in the left sidebar. Then, click on the Connect Mitzu with your data warehouse link.4
Connect Mitzu to ClickHouse
First, select ClickHouse as the connection type and set the connection details. Then, click the
Test connection & Save button to save the settings.5
Configure event tables
Once the connection is saved, select the
Once all tables are configured, click on the
Event tables tab and click the Add table button. In the modal, select your database and the tables you want to add to Mitzu.Use the checkboxes to select at least one table and click on the Configure table button. This will open a modal window where you can set the key columns for each table.To run product analytics on your ClickHouse setup, you need to > specify a few key columns from your table. These are the following:
- User id - the column for the unique identifier for the users.
- Event time - the timestamp column of your events.
- Optional[Event name] - This column segments the events if the table contains multiple event types.
Once all tables are configured, click on the
Save & update event catalog button, and Mitzu will find all events and their properties from the above-defined table. This step may take up to a few minutes, depending on the size of your dataset.6
Run segmentation queries
User segmentation in Mitzu is as easy as in Amplitude, Mixpanel, or PostHog.The Explore page has a left-hand selection area for events, while the top section allows you to configure the time horizon.
7
Run funnel queries
Select up to 9 steps for a funnel. Choose the time window within which your users can complete the funnel.
Get immediate conversion rate insights without writing a single line of SQL code.
8
Run retention queries
Select up to 2 steps for a retention rate calculation. Choose the retention window for the recurring window for
Get immediate conversion rate insights without writing a single line of SQL code.
9
Run journey queries
Select up to 9 steps for a funnel. Choose the time window within which your users can finish the journey. The Mitzu journey chart gives you a visual map of every path users take through the selected events.
10
Run revenue queries
If revenue settings are configured, Mitzu can calculate the total MRR and subscription count based on your payment events.
11
SQL native
Mitzu is SQL Native, which means it generates native SQL code from your chosen configuration on the Explore page.