> ## Documentation Index
> Fetch the complete documentation index at: https://private-7c7dfe99-postgresql-tls-support.mintlify.site/llms.txt
> Use this file to discover all available pages before exploring further.

> Apache Superset is an open-source data exploration and visualization platform.

# Connect Superset to ClickHouse

export const ClickHouseSupportedBadge = () => {
  return <div className="ClickHouseSupportedBadge">
            <div className="ClickHouseSupportedIcon">
                <svg width="16" height="16" viewBox="0 0 16 16" fill="none" xmlns="http://www.w3.org/2000/svg">
                    <path d="M1.30762 1.39073C1.30762 1.3103 1.37465 1.22986 1.46849 1.22986H2.64824C2.72868 1.22986 2.80912 1.29689 2.80912 1.39073V14.4886C2.80912 14.5691 2.74209 14.6495 2.64824 14.6495H1.46849C1.38805 14.6495 1.30762 14.5825 1.30762 14.4886V1.39073Z" fill="currentColor" />
                    <path d="M4.2832 1.39073C4.2832 1.3103 4.35023 1.22986 4.44408 1.22986H5.62383C5.70427 1.22986 5.7847 1.29689 5.7847 1.39073V14.4886C5.7847 14.5691 5.71767 14.6495 5.62383 14.6495H4.44408C4.36364 14.6495 4.2832 14.5825 4.2832 14.4886V1.39073Z" fill="currentColor" />
                    <path d="M7.25977 1.39073C7.25977 1.3103 7.3268 1.22986 7.42064 1.22986H8.60039C8.68083 1.22986 8.76127 1.29689 8.76127 1.39073V14.4886C8.76127 14.5691 8.69423 14.6495 8.60039 14.6495H7.42064C7.3402 14.6495 7.25977 14.5825 7.25977 14.4886V1.39073Z" fill="currentColor" />
                    <path d="M10.2354 1.39073C10.2354 1.3103 10.3024 1.22986 10.3962 1.22986H11.576C11.6564 1.22986 11.7369 1.29689 11.7369 1.39073V14.4886C11.7369 14.5691 11.6698 14.6495 11.576 14.6495H10.3962C10.3158 14.6495 10.2354 14.5825 10.2354 14.4886V1.39073Z" fill="currentColor" />
                    <path d="M13.2256 6.6057C13.2256 6.52526 13.2926 6.44482 13.3865 6.44482H14.5662C14.6466 6.44482 14.7271 6.51186 14.7271 6.6057V9.27354C14.7271 9.35398 14.6601 9.43442 14.5662 9.43442H13.3865C13.306 9.43442 13.2256 9.36739 13.2256 9.27354V6.6057Z" fill="currentColor" />
                </svg>
            </div>
            ClickHouse Supported
        </div>;
};

export const Image = ({img, alt, size = "lg"}) => {
  const normalizedSize = ["sm", "md", "lg"].includes(size) ? size : "lg";
  return <div className={`ch-image-${normalizedSize}`}>
      <Frame>
        <img src={img} alt={alt} />
      </Frame>
    </div>;
};

<a href="https://superset.apache.org/" target="_blank">Apache Superset</a> is an open-source data exploration and visualization platform written in Python. Superset connects to ClickHouse using a Python driver provided by ClickHouse. Let's see how it works...

<h2 id="goal">
  Goal
</h2>

In this guide you will build a dashboard in Superset with data from a ClickHouse database. The dashboard will look like this:

<Image size="md" img="https://mintcdn.com/private-7c7dfe99-postgresql-tls-support/sK1EDai1DhVYGATV/images/integrations/data-visualization/superset_12.webp?fit=max&auto=format&n=sK1EDai1DhVYGATV&q=85&s=7330485f7ec6fac11e3ce12fd19c7fb1" alt="Superset dashboard showing UK property prices with multiple visualizations including pie charts and tables" border width="640" height="551" data-path="images/integrations/data-visualization/superset_12.webp" />

<br />

<Tip>
  **Add some data**

  If you don't have a dataset to work with you can add one of the examples. This guide uses the [UK Price Paid](/get-started/sample-datasets/uk-price-paid) dataset, so you might choose that one. There are several others to look at in the same documentation category.
</Tip>

<Steps>
  <Step title="Gather your connection details" id="1-gather-your-connection-details">
    To connect to ClickHouse with HTTP(S) you need this information:

    | Parameter(s)              | Description                                                                                                    |
    | ------------------------- | -------------------------------------------------------------------------------------------------------------- |
    | `HOST` and `PORT`         | Typically, the port is 8443 when using TLS or 8123 when not using TLS.                                         |
    | `DATABASE NAME`           | Out of the box, there is a database named `default`, use the name of the database that you want to connect to. |
    | `USERNAME` and `PASSWORD` | Out of the box, the username is `default`. Use the username appropriate for your use case.                     |

    The details for your ClickHouse Cloud service are available in the ClickHouse Cloud console.
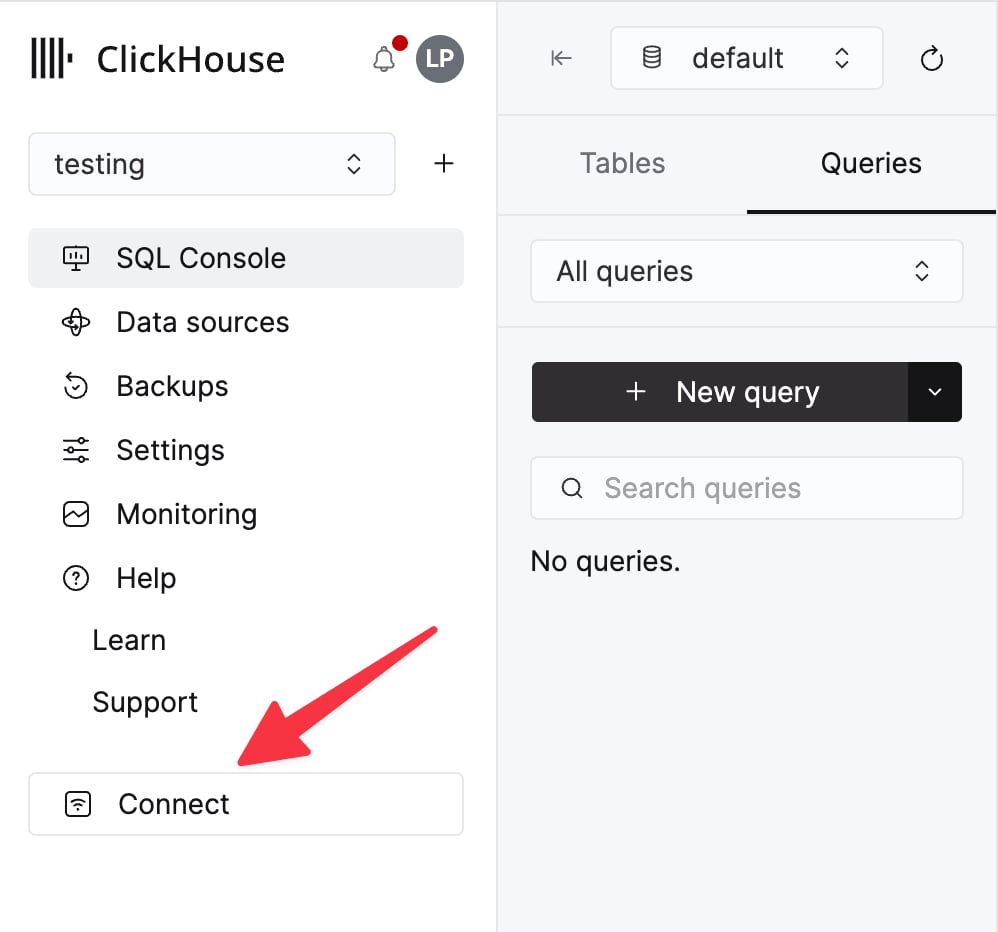
    Select a service and click **Connect**:

    <div className="ch-image-md">
      <Frame>
        <img src="https://mintcdn.com/private-7c7dfe99-postgresql-tls-support/cTIaEq6k6KYDgBI1/images/_snippets/cloud-connect-button.webp?fit=max&auto=format&n=cTIaEq6k6KYDgBI1&q=85&s=dd441fc2272e292760011d48e81d43d4" alt="ClickHouse Cloud service connect button" width="998" height="932" data-path="images/_snippets/cloud-connect-button.webp" />
      </Frame>
    </div>

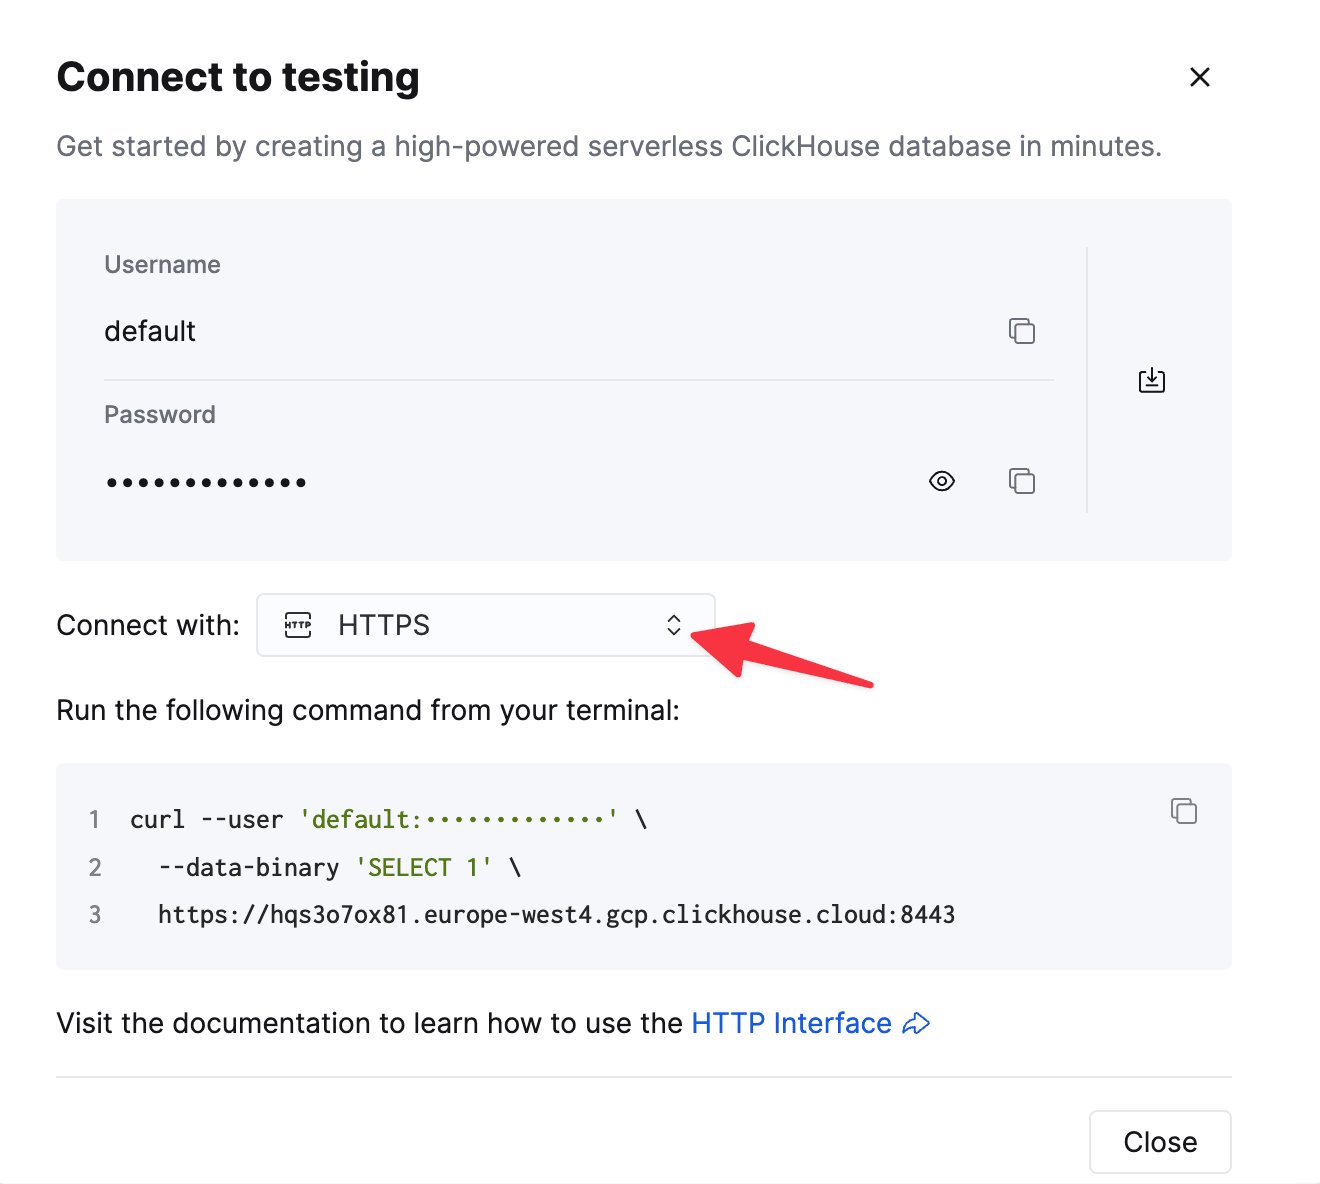
    Choose **HTTPS**. Connection details are displayed in an example `curl` command.

    <div className="ch-image-md">
      <Frame>
        <img src="https://mintcdn.com/private-7c7dfe99-postgresql-tls-support/cTIaEq6k6KYDgBI1/images/_snippets/connection-details-https.webp?fit=max&auto=format&n=cTIaEq6k6KYDgBI1&q=85&s=878b1fe94ea520377426f69503e38994" alt="ClickHouse Cloud HTTPS connection details" width="1320" height="1184" data-path="images/_snippets/connection-details-https.webp" />
      </Frame>
    </div>

    If you're using self-managed ClickHouse, the connection details are set by your ClickHouse administrator.
  </Step>

  <Step title="Install the Driver" id="2-install-the-driver">
    1. Superset uses the `clickhouse-connect` driver to connect to ClickHouse. The details of `clickhouse-connect` are at <a href="https://pypi.org/project/clickhouse-connect/" target="_blank">[https://pypi.org/project/clickhouse-connect/](https://pypi.org/project/clickhouse-connect/)</a> and it can be installed with the following command:

       ```console theme={null}
       pip install clickhouse-connect
       ```

    <Info>
      **Docker Compose Setup**

      For Docker-based installations, see the [Superset database configuration guide](https://superset.apache.org/user-docs/6.0.0/configuration/databases/) for instructions on adding `clickhouse-connect` to your container.
    </Info>

    2. Start (or restart) Superset.
  </Step>

  <Step title="Connect Superset to ClickHouse" id="3-connect-superset-to-clickhouse">
    1. Within Superset, select **Data** from the top menu and then **Databases** from the drop-down menu. Add a new database by clicking the **+ Database** button:

    <Image size="lg" img="https://mintcdn.com/private-7c7dfe99-postgresql-tls-support/sK1EDai1DhVYGATV/images/integrations/data-visualization/superset_01.webp?fit=max&auto=format&n=sK1EDai1DhVYGATV&q=85&s=343bbfe5fc680351a15aaf6f3999ea7b" alt="Superset interface showing the Database menu with + Database button highlighted" border width="1572" height="243" data-path="images/integrations/data-visualization/superset_01.webp" />

    <br />

    2. In the first step, select **ClickHouse Connect** as the type of database:

    <Image size="sm" img="https://mintcdn.com/private-7c7dfe99-postgresql-tls-support/sK1EDai1DhVYGATV/images/integrations/data-visualization/superset_02.webp?fit=max&auto=format&n=sK1EDai1DhVYGATV&q=85&s=ba0876fd76d5635151493b30df83c4bb" alt="Superset database connection wizard showing ClickHouse Connect option selected" border width="622" height="920" data-path="images/integrations/data-visualization/superset_02.webp" />

    <br />

    3. In the second step:

    * Set SSL on or off.
    * Enter the connection information that you collected earlier
    * Specify the **DISPLAY NAME**: this can be any name you prefer. If you will be connecting to multiple ClickHouse databases then make the name more descriptive.

    <Image size="sm" img="https://mintcdn.com/private-7c7dfe99-postgresql-tls-support/sK1EDai1DhVYGATV/images/integrations/data-visualization/superset_03.webp?fit=max&auto=format&n=sK1EDai1DhVYGATV&q=85&s=86ff8079c86bf1d4843e6650c40df1e3" alt="Superset connection configuration form showing ClickHouse connection parameters" border width="499" height="838" data-path="images/integrations/data-visualization/superset_03.webp" />

    <br />

    4. Click the **CONNECT** and then **FINISH** buttons to complete the setup wizard, and you should see your database in the list of databases.
  </Step>

  <Step title="Add a Dataset" id="4-add-a-dataset">
    1. To interact with your ClickHouse data with Superset, you need to define a ***dataset***. From the top menu in Superset, select **Data**, then **Datasets** from the drop-down menu.

    2. Click the button for adding a dataset. Select your new database as the datasource and you should see the tables defined in your database:

    <Image size="sm" img="https://mintcdn.com/private-7c7dfe99-postgresql-tls-support/sK1EDai1DhVYGATV/images/integrations/data-visualization/superset_04.webp?fit=max&auto=format&n=sK1EDai1DhVYGATV&q=85&s=2208485241bca69876abf39e18aaaac8" alt="Superset dataset creation dialog showing available tables from ClickHouse database" border width="412" height="323" data-path="images/integrations/data-visualization/superset_04.webp" />

    <br />

    3. Click the **ADD** button at the bottom of the dialog window and your table appears in the list of datasets. You're ready to build a dashboard and analyze your ClickHouse data!
  </Step>

  <Step title="Creating charts and a dashboard in Superset" id="5--creating-charts-and-a-dashboard-in-superset">
    If you're familiar with Superset, then you will feel right at home with this next section. If you're new to Superset, well...it's like a lot of the other cool visualization tools out there in the world - it doesn't take long to get started, but the details and nuances get learned over time as you use the tool.

    1. You start with a dashboard. From the top menu in Superset, select **Dashboards**. Click the button in the upper-right to add a new dashboard. The following dashboard is named **UK property prices**:

    <Image size="md" img="https://mintcdn.com/private-7c7dfe99-postgresql-tls-support/sK1EDai1DhVYGATV/images/integrations/data-visualization/superset_05.webp?fit=max&auto=format&n=sK1EDai1DhVYGATV&q=85&s=948b5c94113721e8824b8f187ad3201e" alt="Empty Superset dashboard named UK property prices ready for charts to be added" border width="959" height="445" data-path="images/integrations/data-visualization/superset_05.webp" />

    <br />

    2. To create a new chart, select **Charts** from the top menu and click the button to add a new chart. You will be shown a lot of options. The following example shows a **Pie Chart** chart using the **uk\_price\_paid** dataset from the **CHOOSE A DATASET** drop-down:

    <Image size="md" img="https://mintcdn.com/private-7c7dfe99-postgresql-tls-support/sK1EDai1DhVYGATV/images/integrations/data-visualization/superset_06.webp?fit=max&auto=format&n=sK1EDai1DhVYGATV&q=85&s=24e72dd75c597d3b41e6100e7c56fd0f" alt="Superset chart creation interface with Pie Chart visualization type selected" border width="1098" height="998" data-path="images/integrations/data-visualization/superset_06.webp" />

    <br />

    3. Superset pie charts need a **Dimension** and a **Metric**, the rest of the settings are optional. You can pick your own fields for the dimension and metric, this example uses the ClickHouse field `district` as the dimension and `AVG(price)` as the metric.

    <Image size="md" img="https://mintcdn.com/private-7c7dfe99-postgresql-tls-support/sK1EDai1DhVYGATV/images/integrations/data-visualization/superset_08.webp?fit=max&auto=format&n=sK1EDai1DhVYGATV&q=85&s=52b1e73b4bd7cebd108874c40d2109f1" alt="Dimension configuration showing district field selected for pie chart" border width="657" height="633" data-path="images/integrations/data-visualization/superset_08.webp" />

    <Image size="md" img="https://mintcdn.com/private-7c7dfe99-postgresql-tls-support/sK1EDai1DhVYGATV/images/integrations/data-visualization/superset_09.webp?fit=max&auto=format&n=sK1EDai1DhVYGATV&q=85&s=2922a5b983b3418f287bcd81b5010fcd" alt="Metric configuration showing AVG(price) aggregate function for pie chart" border width="657" height="605" data-path="images/integrations/data-visualization/superset_09.webp" />

    <br />

    5. If you prefer doughnut charts over pie, then you can set that and other options  under **CUSTOMIZE**:

    <Image size="sm" img="https://mintcdn.com/private-7c7dfe99-postgresql-tls-support/sK1EDai1DhVYGATV/images/integrations/data-visualization/superset_10.webp?fit=max&auto=format&n=sK1EDai1DhVYGATV&q=85&s=ccfc3530fb778e6fb7e2bd15ece9a5a0" alt="Customize panel showing doughnut chart option and other pie chart configuration settings" border width="320" height="929" data-path="images/integrations/data-visualization/superset_10.webp" />

    <br />

    6. Click the **SAVE** button to save the chart, then select **UK property prices** under the **ADD TO DASHBOARD** drop-down, then **SAVE & GO TO DASHBOARD** saves the chart and adds it to the dashboard:

    <Image size="md" img="https://mintcdn.com/private-7c7dfe99-postgresql-tls-support/sK1EDai1DhVYGATV/images/integrations/data-visualization/superset_11.webp?fit=max&auto=format&n=sK1EDai1DhVYGATV&q=85&s=60d0eda1e45310449659a584fa0e2f0d" alt="Save chart dialog with dashboard selection dropdown and Save & Go to Dashboard button" border width="1442" height="792" data-path="images/integrations/data-visualization/superset_11.webp" />

    <br />

    7. That's it. Building dashboards in Superset based on data in ClickHouse opens up a whole world of blazing fast data analytics!
    <Image size="md" img="https://mintcdn.com/private-7c7dfe99-postgresql-tls-support/sK1EDai1DhVYGATV/images/integrations/data-visualization/superset_12.webp?fit=max&auto=format&n=sK1EDai1DhVYGATV&q=85&s=7330485f7ec6fac11e3ce12fd19c7fb1" alt="Completed Superset dashboard with multiple visualizations of UK property price data from ClickHouse" border width="640" height="551" data-path="images/integrations/data-visualization/superset_12.webp" />

    <br />
  </Step>
</Steps>
