> ## Documentation Index
> Fetch the complete documentation index at: https://private-7c7dfe99-postgresql-tls-support.mintlify.site/llms.txt
> Use this file to discover all available pages before exploring further.

> Efficiently query very large datasets, analyzing and modeling in the comfort of known notebook environment.

# Connect ClickHouse to Deepnote

export const CommunityMaintainedBadge = () => {
  return <div className="CommunityMaintainedBadge">
            <div className="CommunityMaintainedIcon">
            <svg xmlns="http://www.w3.org/2000/svg" width="20" height="20" fill="currentColor" viewBox="0 0 256 256">
                <path d="M244.8,150.4a8,8,0,0,1-11.2-1.6A51.6,51.6,0,0,0,192,128a8,8,0,0,1-7.37-4.89,8,8,0,0,1,0-6.22A8,8,0,0,1,192,112a24,24,0,1,0-23.24-30,8,8,0,1,1-15.5-4A40,40,0,1,1,219,117.51a67.94,67.94,0,0,1,27.43,21.68A8,8,0,0,1,244.8,150.4ZM190.92,212a8,8,0,1,1-13.84,8,57,57,0,0,0-98.16,0,8,8,0,1,1-13.84-8,72.06,72.06,0,0,1,33.74-29.92,48,48,0,1,1,58.36,0A72.06,72.06,0,0,1,190.92,212ZM128,176a32,32,0,1,0-32-32A32,32,0,0,0,128,176ZM72,120a8,8,0,0,0-8-8A24,24,0,1,1,87.24,82a8,8,0,1,0,15.5-4A40,40,0,1,0,37,117.51,67.94,67.94,0,0,0,9.6,139.19a8,8,0,1,0,12.8,9.61A51.6,51.6,0,0,1,64,128,8,8,0,0,0,72,120Z"></path>
            </svg>
        </div>
            Community Maintained
        </div>;
};

export const Image = ({img, alt, size = "lg"}) => {
  const normalizedSize = ["sm", "md", "lg"].includes(size) ? size : "lg";
  return <div className={`ch-image-${normalizedSize}`}>
      <Frame>
        <img src={img} alt={alt} />
      </Frame>
    </div>;
};

<a href="https://www.deepnote.com/" target="_blank">Deepnote</a> is a collaborative data notebook built for teams to discover and share insights. In addition to being Jupyter-compatible, it works in the cloud and provides you with one central place to collaborate and work on data science projects efficiently.

This guide assumes you already have a Deepnote account and that you have a running ClickHouse instance.

<h2 id="interactive-example">
  Interactive example
</h2>

If you would like to explore an interactive example of querying ClickHouse from Deepnote data notebooks, click the button below to  launch a template project connected to the [ClickHouse playground](/get-started/sample-datasets/playground).

[<img src="https://deepnote.com/buttons/launch-in-deepnote.svg" alt="Launch in Deepnote" width="32" />](https://deepnote.com/launch?template=ClickHouse%20and%20Deepnote)

<h2 id="connect-to-clickhouse">
  Connect to ClickHouse
</h2>

1. Within Deepnote, select the "Integrations" overview and click on the ClickHouse tile.

<Image size="lg" img="https://mintcdn.com/private-7c7dfe99-postgresql-tls-support/jCcMIFRXeNsMw8EN/images/integrations/data-visualization/deepnote_01.webp?fit=max&auto=format&n=jCcMIFRXeNsMw8EN&q=85&s=1c43bd47cc7ee737d1b9f5474849f2f3" alt="ClickHouse integration tile" border width="3024" height="1368" data-path="images/integrations/data-visualization/deepnote_01.webp" />

2. Provide the connection details for your ClickHouse instance:

To connect to ClickHouse with HTTP(S) you need this information:

| Parameter(s)              | Description                                                                                                    |
| ------------------------- | -------------------------------------------------------------------------------------------------------------- |
| `HOST` and `PORT`         | Typically, the port is 8443 when using TLS or 8123 when not using TLS.                                         |
| `DATABASE NAME`           | Out of the box, there is a database named `default`, use the name of the database that you want to connect to. |
| `USERNAME` and `PASSWORD` | Out of the box, the username is `default`. Use the username appropriate for your use case.                     |

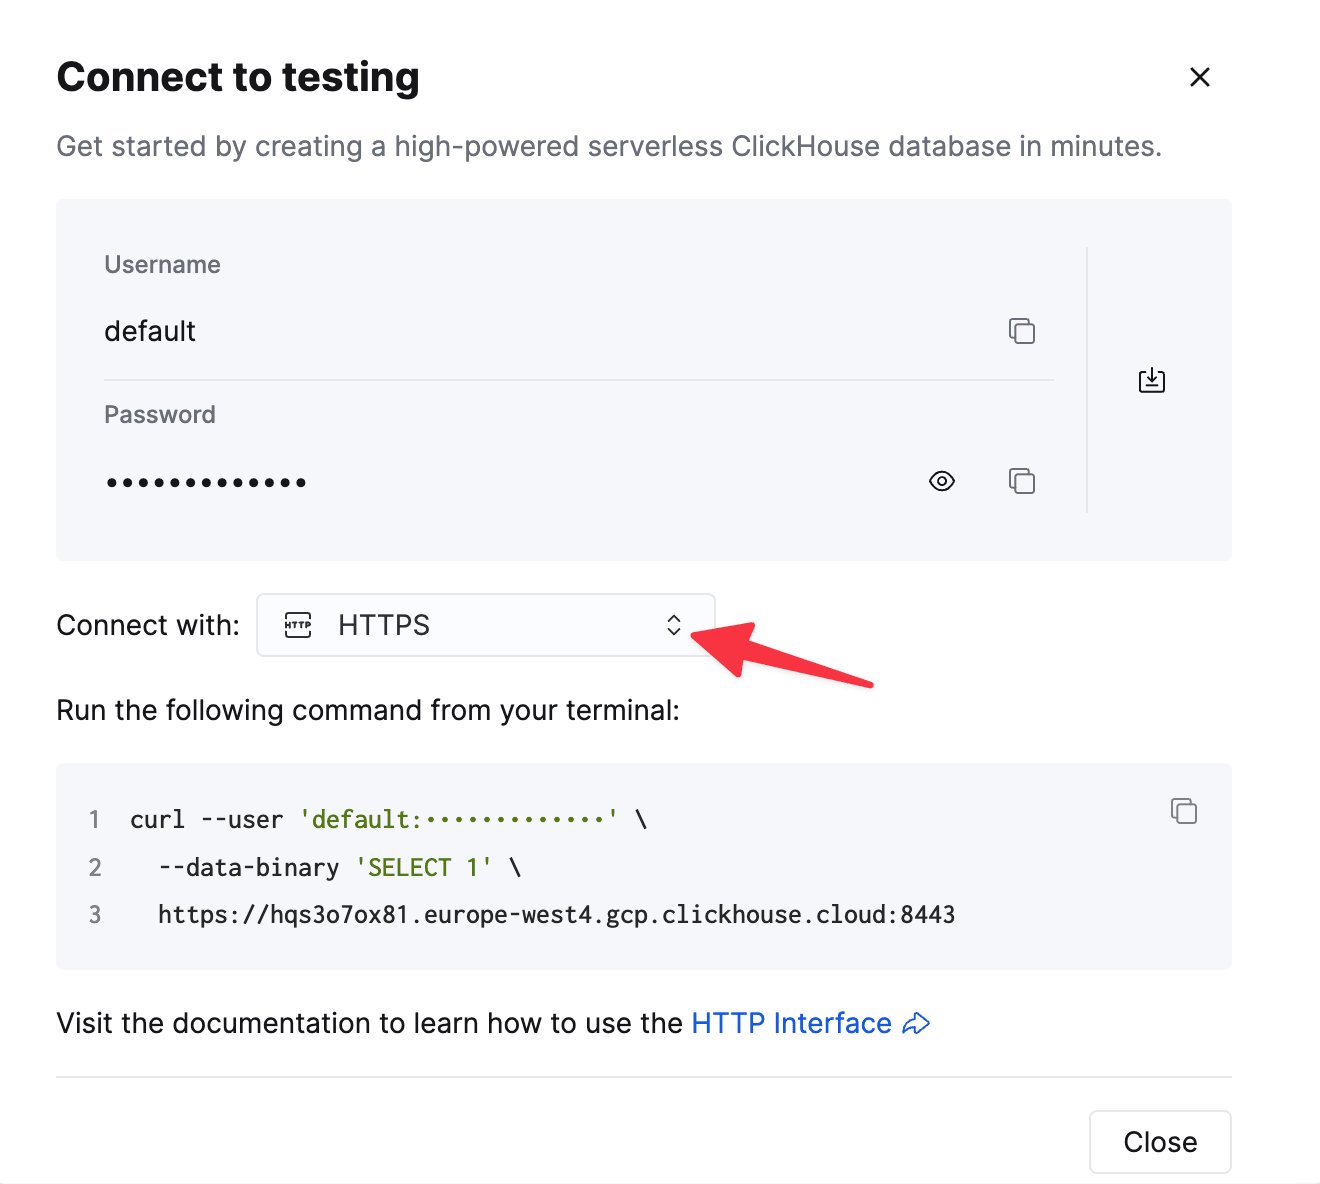
The details for your ClickHouse Cloud service are available in the ClickHouse Cloud console.
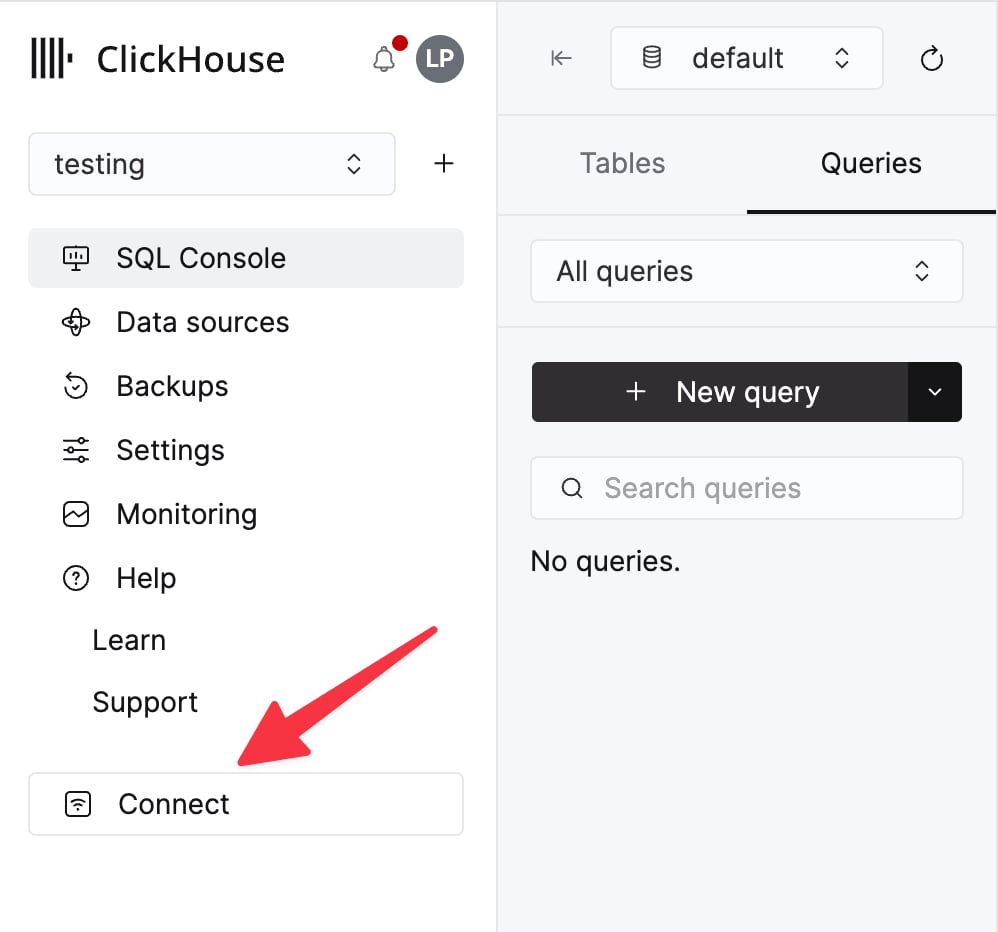
Select a service and click **Connect**:

<div className="ch-image-md">
  <Frame>
    <img src="https://mintcdn.com/private-7c7dfe99-postgresql-tls-support/cTIaEq6k6KYDgBI1/images/_snippets/cloud-connect-button.webp?fit=max&auto=format&n=cTIaEq6k6KYDgBI1&q=85&s=dd441fc2272e292760011d48e81d43d4" alt="ClickHouse Cloud service connect button" width="998" height="932" data-path="images/_snippets/cloud-connect-button.webp" />
  </Frame>
</div>

Choose **HTTPS**. Connection details are displayed in an example `curl` command.

<div className="ch-image-md">
  <Frame>
    <img src="https://mintcdn.com/private-7c7dfe99-postgresql-tls-support/cTIaEq6k6KYDgBI1/images/_snippets/connection-details-https.webp?fit=max&auto=format&n=cTIaEq6k6KYDgBI1&q=85&s=878b1fe94ea520377426f69503e38994" alt="ClickHouse Cloud HTTPS connection details" width="1320" height="1184" data-path="images/_snippets/connection-details-https.webp" />
  </Frame>
</div>

If you're using self-managed ClickHouse, the connection details are set by your ClickHouse administrator.

<Image size="md" img="https://mintcdn.com/private-7c7dfe99-postgresql-tls-support/jCcMIFRXeNsMw8EN/images/integrations/data-visualization/deepnote_02.webp?fit=max&auto=format&n=jCcMIFRXeNsMw8EN&q=85&s=ebf8cbdb3a490fbd8d9fc89fb3c035bc" alt="ClickHouse details dialog" border width="1827" height="1061" data-path="images/integrations/data-visualization/deepnote_02.webp" />

***NOTE:*** If your connection to ClickHouse is protected with an IP Access List, you might need to allow Deepnote's IP addresses. Read more about it in [Deepnote's docs](https://deepnote.com/docs/securing-connections).

3. Congratulations! You have now integrated ClickHouse into Deepnote.

<h2 id="using-clickhouse-integration">
  Using ClickHouse integration.
</h2>

1. Start by connecting to the ClickHouse integration on the right of your notebook.

   <Image size="lg" img="https://mintcdn.com/private-7c7dfe99-postgresql-tls-support/jCcMIFRXeNsMw8EN/images/integrations/data-visualization/deepnote_03.webp?fit=max&auto=format&n=jCcMIFRXeNsMw8EN&q=85&s=f88b4e6772db41a8d82db44109cacf21" alt="ClickHouse details dialog" border width="3008" height="1086" data-path="images/integrations/data-visualization/deepnote_03.webp" />

2. Now create a new ClickHouse query block and query your database. The query results will be saved as a DataFrame and stored in the variable specified in the SQL block.

3. You can also convert any existing [SQL block](https://docs.deepnote.com/features/sql-cells) to a ClickHouse block.